Lecture Capture
Re/Play can be used to record in-person lectures automatically or manually. For asynchronous lecture recordings, see
On this page you can:
- Look at the initial setup for automatic or manual recordings.
- Familiarise yourself with the recording process and equipment you'll use during your lecture.
- See what happens after the recording.
- Check the ownership of the recording and who will get email notifications.
You may also want to see information about policy, accessibility, copyright and external speakers.
Automatic lecture capture – initial setup checklist
Re/Play is set up to automatically record unit sessions that fulfil certain criteria and publish recordings to students after 24 hours.
Automatic recordings draw on information from various places in the University, so it’s important that we have the right information about your session to make sure the right thing is recorded. Work through this checklist before teaching starts, to ensure your recordings happen as planned.
1. Is your room equipped?c
- Check if the room you will teach in is equipped to record: From the Central Teaching Spaces page, find your room and look for Yes under the Re/Play equipped column.
- Check if your room has special equipment, eg adjustable cameras or visualisers. Very few cameras in rooms are adjustable, most are fixed to record the writing board. Equipment such as document cameras and visualisers, as well as boundary or lapel mics, also vary by room, so it’s important to know what you expect. If you need any of these contact the IT Service Desk to ask for specific information about different room set ups.
2. Is the information correct in the Timetable?
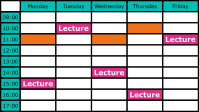
- A session must be tagged as a lecture in the Activity Type field in the timetable to auto record. One way to check this is to open the web timetable, and generate a pdf version of your unit’s timetable in ‘List’ view. There, you can check the Activity Type. Note that it is possible for sessions to be called something other than ‘lecture’ for students – eg ‘workshop’ – but they need to have the ‘lecture’ tag in the system to trigger automatic recording. If your session doesn't have the 'lecture tag', contact your Timetabling Education Officer.
- Check the following, also in the timetable– if either isn’t correct, contact your School admin team:
- Unit code: This is crucial to the Re/Play system finding the session.
- Named staff member for the session, in the Staff field. This person will be the recording’s owner and will receive a notification when the recording is ready. If there is no-one or multiple/various staff named, the Unit Director will own the recording and receive notifications about it.
3. Do you know what will be recorded?

By default, the automatic lecture recording will capture audio and a screencast of what you show on the computer you connect to the room system.
If you need camera recording as well (ie to show the lecturer and the marker board) you will need to contact the IT Service desk and ask for the Camera template to be enabled for your sessions. This will change the settings for all recordings on the unit. To change the recording setting for a single lecture, simply stop the lecture recording with a 5 second long press of the buttons, then use the Record Now app to start a new recording with your choice of capture option.
- Camera: This will capture your screen captured, as well as what the room camera can capture (as "normal" video). A few cameras in rooms can zoom and pan to different views, but most are fixed to record the chalkboards / whiteboards. If there are multiple boards in the room, stickers on the board will show the capture area.
- Screencast: This is the default capture setting and will capture moving content such as video or live annotation, visualiser or mouse movements. View full Screencast example (Video, 1 min).
If you have considered all these three items, you are ready! Your sessions will be automatically recorded for the duration of the unit.
If not, you can record lectures manually using Record Now if your room is equipped. Or browser-based recording if it’s not.
Manual lecture capture - initial setup
Check if the room you will teach in is equipped to record: From the Central Teaching Spaces page, find your room and look for Yes under the Re/Play equipped column. If it is Re/Play-equipped, you can record manually with Record Now on the podium PC. If it’s not, you can record to Re/Play manually on your own laptop using browser-based recording.
Manual recording with Record Now
You don’t have to do anything specific for initial setup, but please familiarise yourself with the available capture options to select which is the best for your lecture, the room’s equipment and how Record Now works.
Capture options
There are two options (sometimes called "templates") for what will be captured in the recording. Which you choose will depend on the type of visual information you would like included in a recording. Both options will record the mic audio and the computer audio (if there is any and the computer audio volume is turned up). These options cannot be changed for lectures that have already been recorded, but future lectures in a unit can be set to use a different template (ask IT to do this for you.)
- Screencast: This is recommended if you need to capture moving content such as video or live annotation, visualiser or mouse movements, as it captures 30 frames per second. View examples of the different results you get with Slides vs Screencast. Screencast example (Video, 1 min).
- Camera Slides & Audio: This will include your slides at a low frame rate, as well as what the room camera can capture. Slides & Camera example (Video, 1 min).
If you are recording the lecture manually using Record Now, you can choose your preferred capture option before you start recording.
Manual recording with browser-based recording
Re/Play presentations can be created on your laptop. Practice recording at home, and make sure to bring the laptop, mic and webcam to your lecture. Once your lecture has been recorded, you can set permissions, edit the video itself and its captions, add it to your Blackboard course and see the analytics.
Recording in equipped rooms - what to expect during the session
The sections below are relevant if you are teaching in an equipped room. Non-equipped rooms don’t have recording technology, but academic staff can bring their own laptops and manually record the lecture.
Unless you have made a different arrangement with IT, the recording will only capture the content shown on the main screen and the available audio. Make sure you’ve worked through the initial set up checklists for automatic and manual recording before your sessions.
Here you can learn more about how recording works during automated or manual recordings, as well as get information about microphones, presentation slides and cameras.
How recording works in the room
Automated recordings
- Automated recordings are scheduled to start and stop automatically. Recording will begin automatically at the schedule lecture start time and stop five minutes before the scheduled end. For example, the recording of a one-hour lecture scheduled for 2pm will start at 2pm and end at 2.55pm.
- You will know recording has started when the red light is continuously on. The red light comes on a few seconds before the recording starts, so the pause button will not work straight away. To check whether a recording is under way, you can use the Record Now app to check the Recorder Status (log on to the room PC and click on the Record Now recorder desktop shortcut).
- A short press of the lectern button will pause / restart the recording. Note, the Record Now counter will continue.
- Pressing for 5 seconds will end the recording completely.
- If your lecture is continuing past its scheduled end or you have ended the recording by mistake, you can start a new recording using the Record Now app on the computer in the room. When you’ve finished, stop the recording by pressing the lectern button for 5 seconds.
- If another lecture is scheduled to be recorded after yours, you won’t be able to record over it.
- If the recording doesn’t start automatically (the red light is not on) even though your session meets the criteria for automated recording, use Record Now to start a new recording. When the lecture is over, check your session's data in the timetable.
If you have a Re/Play technology issue, please contact the TLC Team on 0117 42 82222 (internal: 82222) or contact the IT Department.
Manual recordings
The Record Now app allows you to manually start recordings and is installed on a computer in each of the Re/Play equipped rooms. The app can be used to capture lectures that have not been scheduled to record or have failed to start. You can also use Record Now to restart recordings which have been stopped.
Once recording has begun, you can use the lectern button to pause/ restart (short press) and stop (press for 5 seconds) the recording if you wish. Otherwise, the recording will stop at the time you scheduled.
Note: If another lecture is already scheduled to start during that time, Record Now can’t override it. If a lecture is scheduled to be recorded straight after your lecture, Record Now will not allow your recording to overrun.
Sound
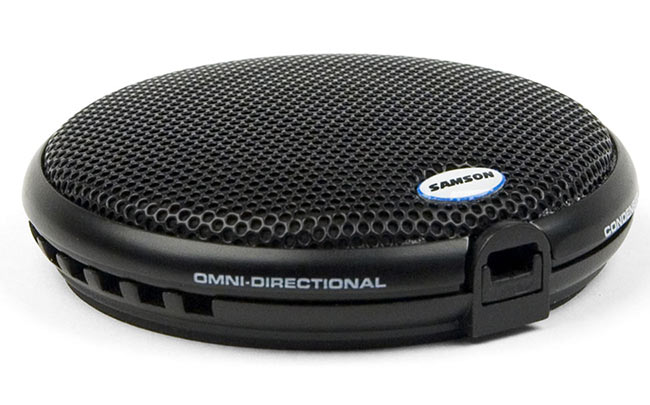
It’s recommended to use the lapel microphone if one is available in the room for maximum recording quality and better auto-captioning. A boundary microphone will also pick up the audio of the whole room. If you can’t use the lapel mic, please remain near the boundary microphone, otherwise your recording may have no sound or poor quality sound.
When using the lapel mic, ensure it is charged, ON, not set to Mute, and secured close enough to your mouth for your voice to be recorded clearly. Make sure you correctly replace the microphone in the charger after your lecture so it can be used for the next recording. Spare batteries are also provided in all Lecture rooms.
If you use a lapel mic and the sound is still not recorded, please contact the IT department.
Computer audio can be recorded if the AV system volume is turned up to a decent level on the control panel.
Presentation slides on computer
If you want your presentation slides to be recorded, make sure you plug in a computer with a presentation. To avoid recording issues, please note the following:
- If you use an Apple Mac computer, you can now connect directly to the HDMI.
- Ensure the screen resolution of the lecture room monitor matches what’s on the sticker on the monitor.
- If you play a DVD, its video content will not be recorded (due to copyright) and only audio will be available.
If your recording only has audio recorded or the recording is green, it's for one of the reasons above.
Camera
Camera recording for scheduled sessions must be requested in advance from IT support.
The cameras are in a fixed position on the ceiling in the back of the rooms, and shouldn’t be tampered with. The camera is usually set to capture the main chalkboard and anyone standing in front of it. There are markers to show the area that is captured by the camera.
In a few rooms the cameras have zoom presets to show several fields of view. You can pick a field of view by using the touch-screen control panel on the lectern. The monitor will show what the camera will be recording. If your choice of zoom captures any students you should inform them and give them the option to sit elsewhere where they won’t be seen on camera.
After the recording

You will receive an email when the recording is ready for you to edit and publish. You can access recordings via the My Re/Play link in Blackboard (under Tools for Staff on the home page), once you have logged into Blackboard. Once you are in the ’My Re/Play’ area, you can locate a specific lecture via the shared folder for the unit (found from the left navigation bar).
You can edit the description, tags and title of a recording. Please DO NOT change the unit code and ensure that you keep the year suffix (eg ABCD12345_2015) at the beginning of the title. This will enable the recording to be found in searches by students and lecturers and enable the running of essential performance reports
You can also edit the video or publish the video yourself within the next 24 hours. If you don’t do either, the recording will be automatically published, unedited, after one working day.
Captions will be added automatically once the video is published. You can edit the captions to ensure they are accurate.
Automatic lecture recordings will be added to the unit's collection via the Re/Play link in Blackboard, where students will be able to access it. We strongly recommend making sure the Re/Play link is not hidden from students. You can also add the video to a different place in your Blackboard course, see the analytics and share editing permissions with colleagues. To give access to people from outside the university, you can either set the Who Can View setting to Everyone and share the URL, or download a file copy. Ensure that you have permission from everyone seen or heard in the recording, and that all content is also cleared for sharing outside of the University by the content owner(s).
If you can’t see your recording, the most likely cause is that someone else has been made the owner.
Recording ownership and notifications
Re/Play recordings can only have one owner. This is the person who receives email notifications. The owner can give others editing permissions.
For automatically recorded lectures, the owner is the named person for the session in the Staff field in timetable, or - if there is no-one or multiple staff named - the Unit Director.
Re/Play has been set to grant access to all academics on a shared unit without having to ask the Unit Directors for access.
If you can see recorded lectures that are not yours in My Re/Play, that’s probably because you are a Unit Director or academic on a shared unit.
If you are receiving email notifications about lectures you did not deliver or not receiving notifications about lectures you did, this could be caused by incomplete or incorrect data. If the Staff field in the timetable is not correct, contact your School administration team to change the information.