Last updated: 24/02/2015
Please see how to plan and structure your content.
Examples of standard page layouts are provided below. If you need a custom layout, please contact us. Don’t create your own custom layouts.
Homepage layouts should be created in consultation with the Web Editor team.
When you add content to the ‘body text’ field in a normal content block, the content will automatically fill the space between the left navigation menu and the right edge of the double-line border beneath the page title.
The right-hand column should be used for related material or images. When using a right-hand column, content should be within styled containers known as modules.
To create a page with a right-hand column, you need to use the layout grid.
The layout grid is made up of rows and columns and sits within a layout-container. Most pages will only have one row containing two columns, but more advanced pages such as homepages may use multiple rows containing two or three columns.
The standard layout for a page using one wide central column and one narrow right-hand column within a single row looks like this:
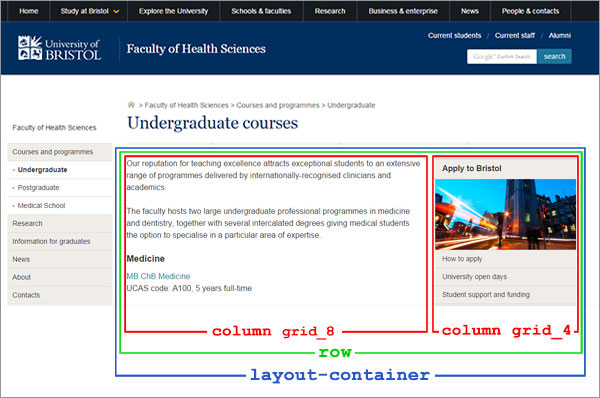
This uses the following code:
The wide column <div> has a class of column grid_8 and the narrow right column <div> has a class of column grid_4. Some pages (eg homepages) will use three columns of column grid_4.
Once you have set up the grid, you can use modules to add content to the right-hand column.